

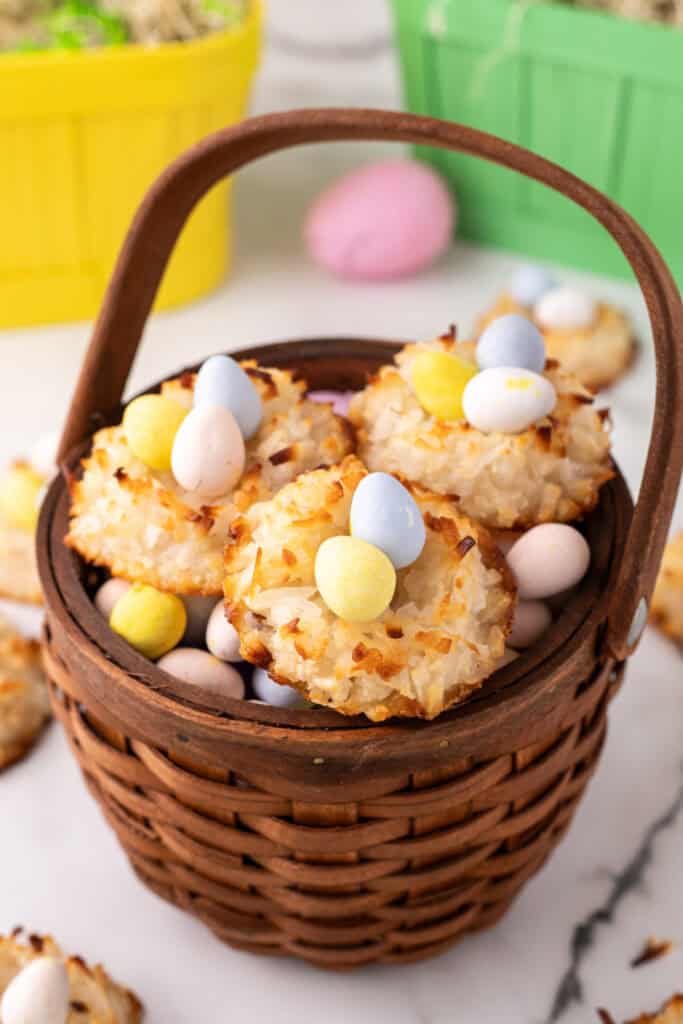
🌸🥥 These adorable Coconut Easter Nests are the perfect sweet treat for spring! Made with chewy coconut and filled with colorful egg-shaped candies, they’re easy to make and so festive! 🐣💛
Coconut Easter Nest Cookies – A Fun & Festive Easter Treat!
Looking for a simple and adorable Easter dessert? These Coconut Easter Nests are the perfect springtime treat! Made with sweet, chewy coconut and topped with colorful egg candies, they’re easy to make and guaranteed to be a hit with kids and adults alike.
⭐ Why You’ll Love This Recipe
- Simple Ingredients – Made with just a handful of pantry staples.
- Fun & Festive – Perfect for Easter celebrations or spring-themed parties.
- Kid-Friendly – Little ones will love helping shape and decorate the nests!
- Gluten-Free – Naturally gluten-free for those with dietary restrictions.
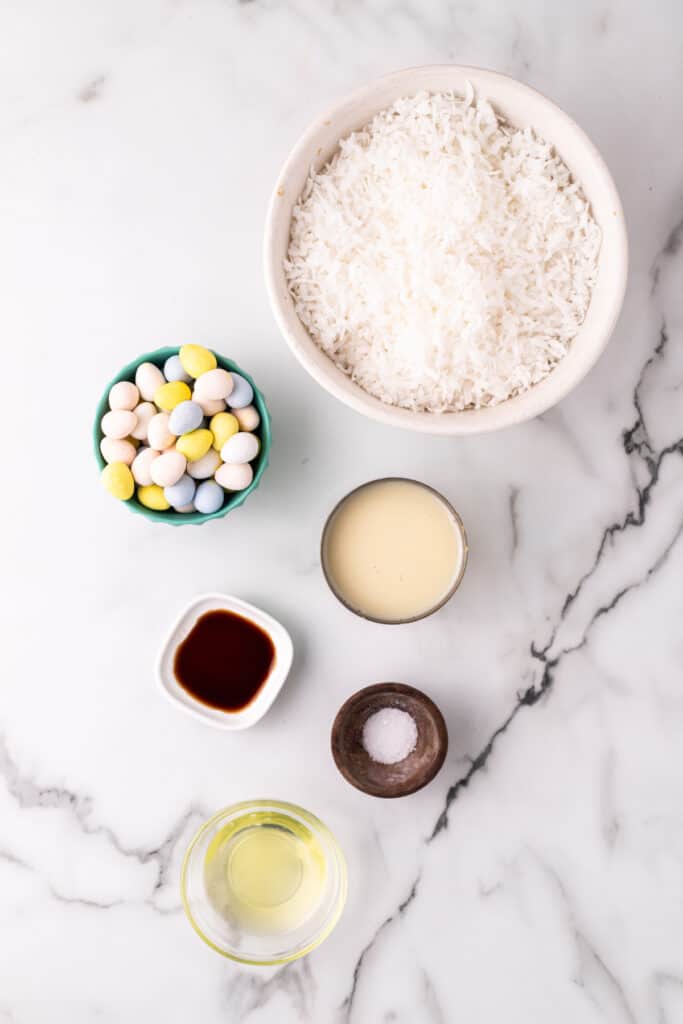
🛒 Ingredients & Substitutions
- flake coconut – Shredded coconut works too, though the texture may vary.
- sweetened condensed milk – Swap with dairy-free condensed milk for a vegan version.
- egg white – Use a flax egg (1 tbsp flaxseed + 3 tbsp water) for an egg-free option.
- vanilla extract
- salt
- Cadbury mini egg-shaped candies – Swap Cadbury Mini Eggs for jelly beans, chocolate-covered almonds, or other similar candy.

🔥 Tips for the Best Coconut Nests
- Use Parchment Paper – Prevents sticking and makes cleanup easy.
- Shape While Warm – If the nests spread during baking, reshape them immediately.
- Cool Completely – Ensure they are fully set before adding candies.
Would you like to save this?
❓ FAQs
Yes! Store them in an airtight container at room temperature for up to 3 days.
Absolutely! Freeze in a sealed container for up to 1 month. Let them thaw before serving.
Yes, but they may be less sweet. You can add a little extra sweetened condensed milk if needed.
Make sure your coconut mixture isn’t too wet. If needed, refrigerate the dough for 10-15 minutes before shaping the nests.
Absolutely! Try drizzling melted chocolate over the nests or placing a chocolate disc in the center before adding the candy eggs.
Bake them a few extra minutes until they’re golden brown. You can also toast the coconut lightly before mixing to enhance the texture and flavor.
Yes! Press the coconut mixture into a parchment-lined baking pan, bake, then cut into squares once cooled.
Fresh coconut contains more moisture, so it may not hold together as well. If using fresh, try squeezing out excess liquid before mixing.

🍽️ Other Recipes You May Enjoy

Coconut Easter Nests
Equipment
- baking sheet
- parchment paper
- medium mixing bowl
- wooden spoon or rubber spatula for mixing
- cookie scoop
- cooling rack
Ingredients
- 1 bag flake coconut 14 oz
- 1 can sweetened condensed milk 14 oz
- 1 large egg white
- 1 teaspoon vanilla extract
- ½ teaspoon salt
- Cadbury mini egg-shaped candies or similar candy
Instructions
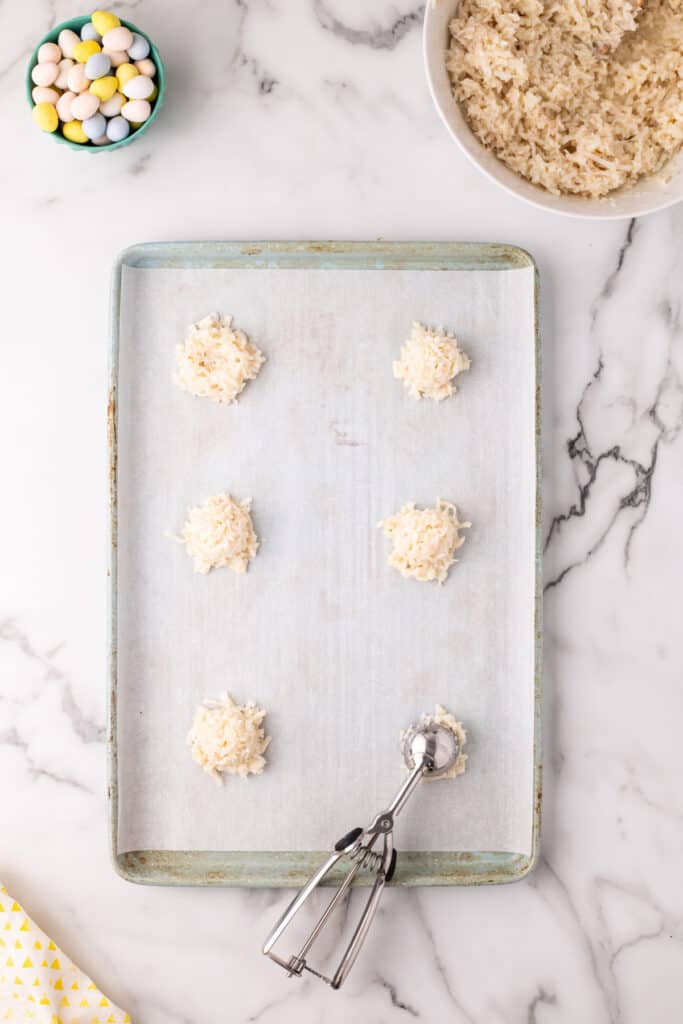
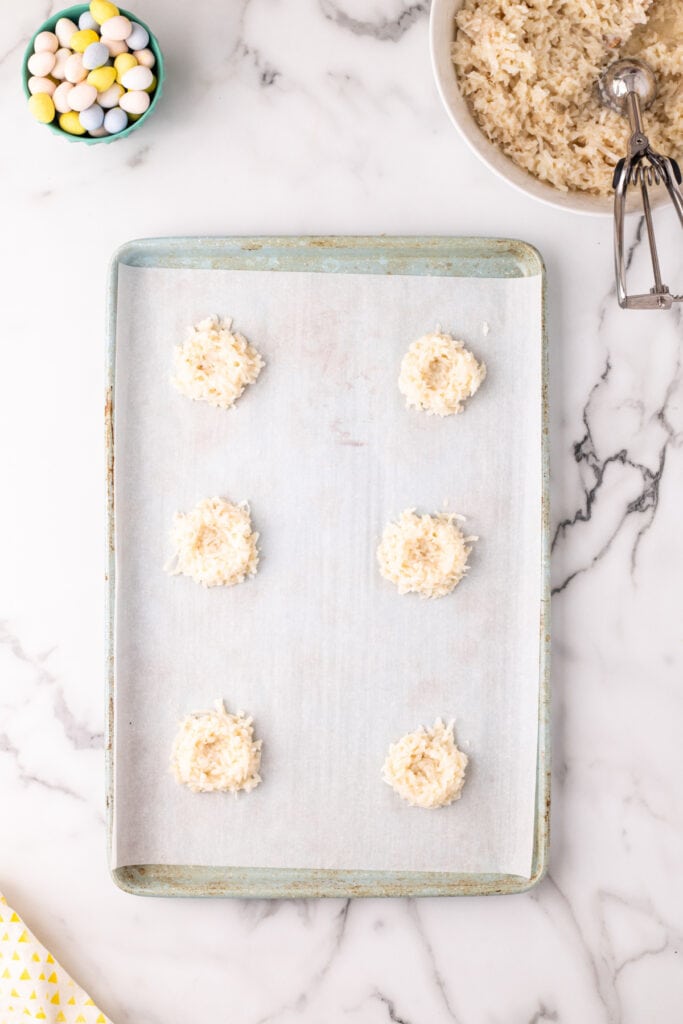
- Preheat oven to 375°F. Line a baking sheet with parchment paper and set aside.
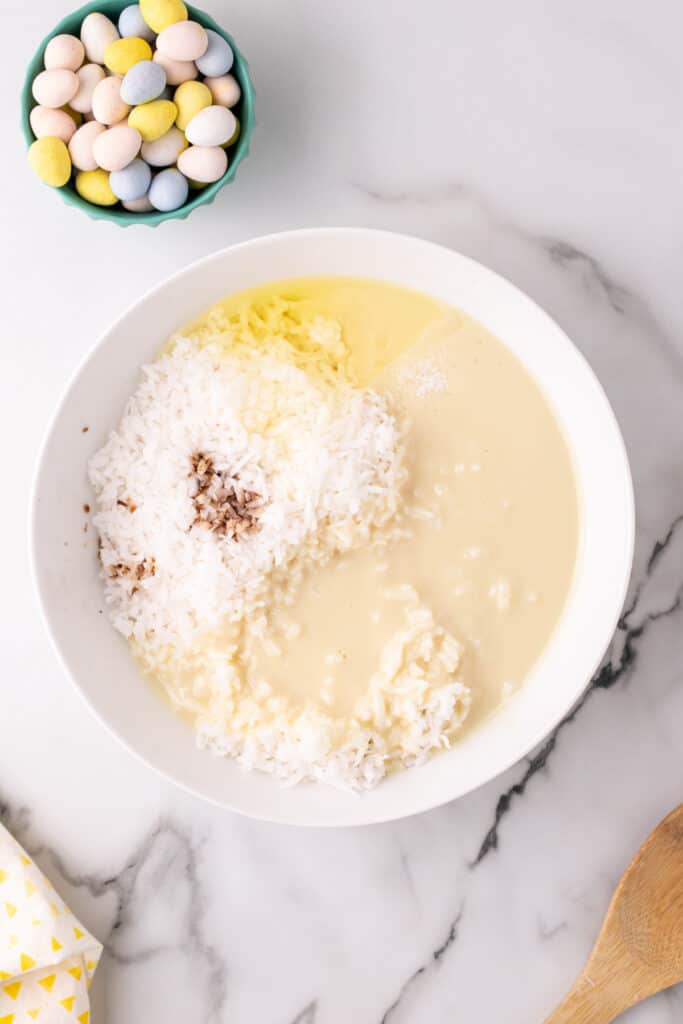
- In a medium bowl, mix all ingredients, except the candies, together until well blended.
- Place about 1/4 cup mounds of coconut dough on the prepared pan.
- Bake for 15-18 minutes until golden brown. Cookies may lose shape during baking; simply use a cup placed over the top and carefully rotated in circles to reshape them.
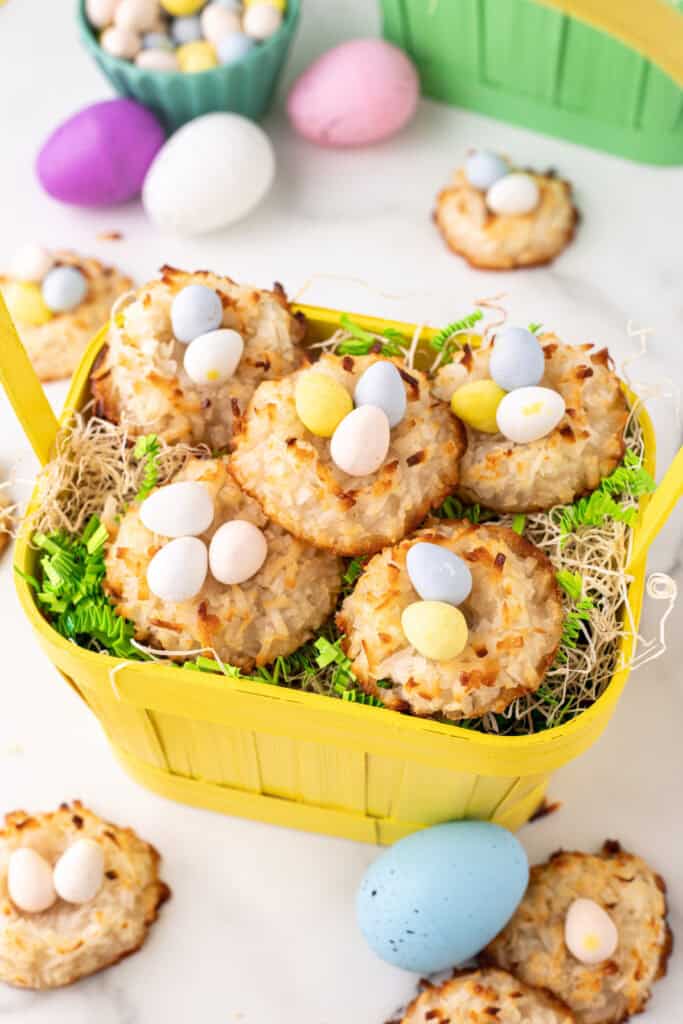
- Make an indentation with your thumb or rounded measuring spoon to form a nest.
- Let cool completely and fill with egg-shaped candies.
Notes
Storage & Freezing Instructions
How to Store Leftovers:- Store at room temperature in an airtight container for up to 3 days.
- For longer freshness, refrigerate in a sealed container for up to 1 week.
Yes! Coconut Easter Nests freeze well. Here’s how:
- Place the cooled nests in a single layer in an airtight container. If stacking, separate layers with parchment paper.
- Freeze for up to 1 month.
- When ready to serve, thaw at room temperature for about 30 minutes before adding the candy eggs.
Nutrition
Please note that the nutritional information listed on this page is an estimation based on the products I used. Ingredients and nutritional information can vary significantly between brands. Always be sure to read labels. Please verify that a recipe fits your needs before using it. Nutrition info may contain errors, so please verify it independently. Likewise, recipes may contain errors, so please use your common sense when following them.

I’m Jamie, a self-taught home cook passionate about sharing easy, delicious, and family-friendly recipes. From comforting classics to irresistible desserts, I believe homemade food brings people together. Join me on my journey of creating and sharing meals that bring joy to every table!

Leave a Reply