

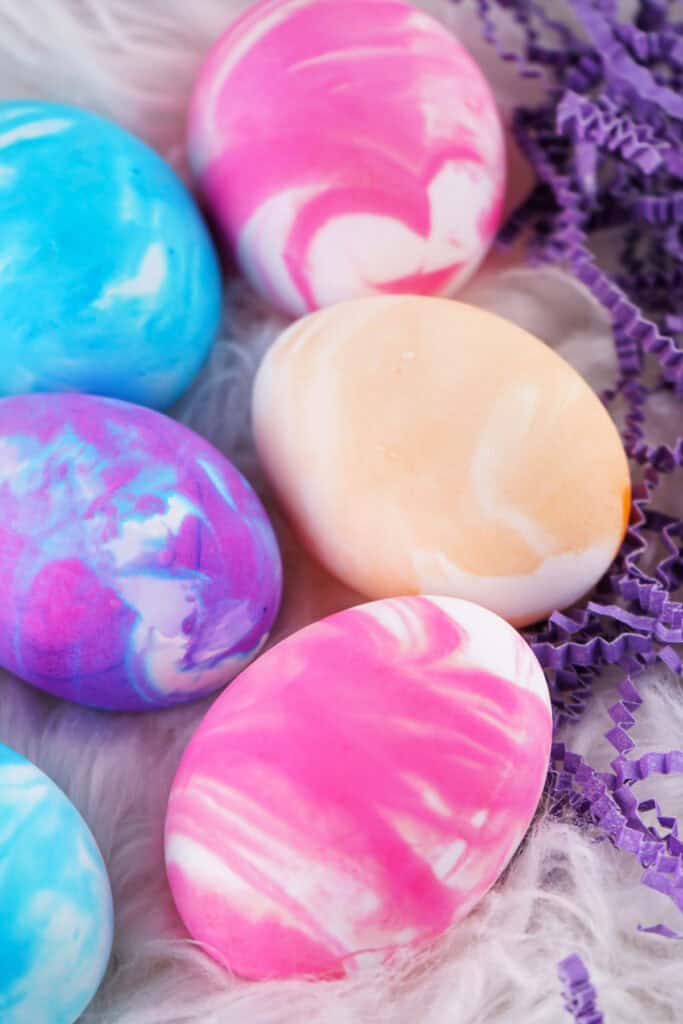
Try Cool Whip Dyed Easter Eggs for a fun, mess-free way to create vibrant, marbled eggs! Just swirl food dye into Cool Whip, roll the eggs, and rinse for stunning designs. Perfect for kids and a unique twist on traditional egg dyeing! 🥚🎨
Cool Whip Dyed Easter Eggs – A Fun & Easy Easter Craft!
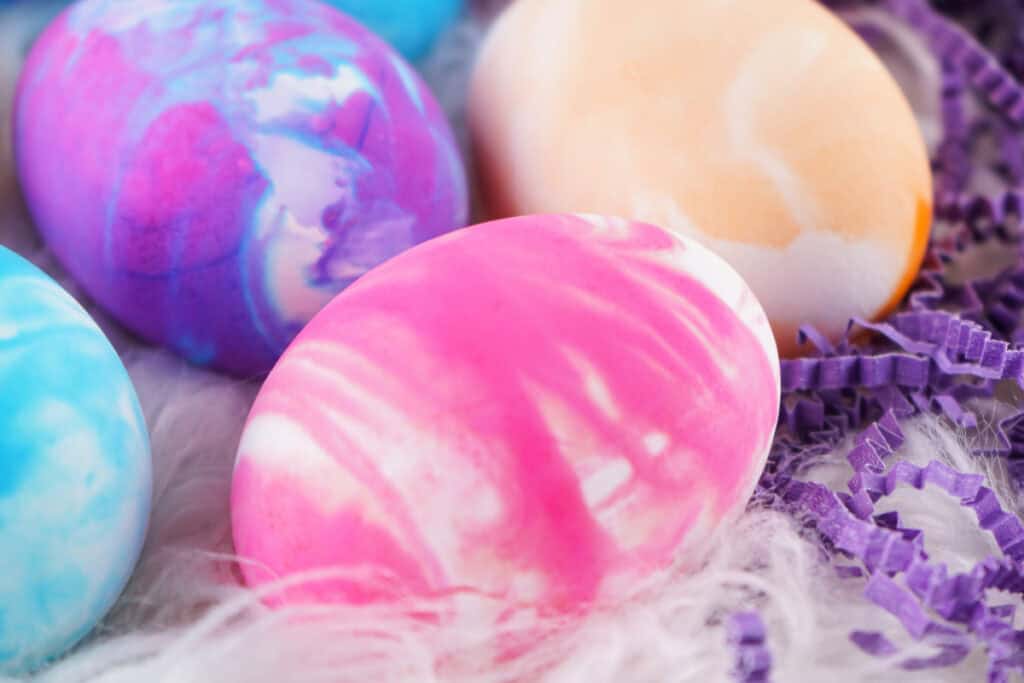
Looking for a creative, mess-free way to dye Easter eggs? Try Cool Whip Dyed Easter Eggs! This simple method creates gorgeous, marbled eggs using just Cool Whip, food dye, and vinegar. It’s kid-friendly, easy to clean up, and a fun twist on traditional egg dyeing.
⭐ Why You’ll Love This Recipe
- Mess-Free Fun – No cups of liquid dye to spill!
- Kid-Friendly – Easy for little hands to roll and create swirls.
- Unique Designs – Get vibrant, marbled eggs with no two alike!
- Edible & Safe – Unlike shaving cream, Cool Whip is food-safe.
🛒 Ingredients & Substitutions
- Hard-Boiled Eggs – Any type works! White eggs show brighter colors.
- Cool Whip – Substitute with whipped cream for a similar effect. Dairy-free? Use coconut whipped topping!
- Food Dye – Gel dye creates bold colors, while liquid dye gives softer hues.
- Vinegar – Essential for helping the color stick.
Would you like to save this?

🔥 Tips
- Keep eggs in the fridge between steps for freshness.
- Use gloves to prevent stained hands.
- Cool Whip should be about 1 inch deep in the dish.
- Avoid leaving eggs in the Cool Whip overnight—it may damage the shells.
- Use less gel dye, as it’s more concentrated than liquid dye.

❓ FAQs
Yes! As long as they’re stored properly and not left out too long, they’re safe to eat.
Use less dye or mix a little white food coloring with your chosen shades.
Nope! Once dry, the colors stay put.
At least 10 minutes for vibrant colors. Leaving them longer (up to 30 minutes) can deepen the shades, but don’t leave them overnight, as the acidity can damage the shells.
If you plan to eat them later, it’s best to refrigerate them during any waiting periods to keep them fresh.
You can, but the colors will mix and become muddled. If you want vibrant designs, use a fresh layer of Cool Whip for each batch.
Gently rinse under cool running water without rubbing to avoid smearing the colors. Pat dry with paper towels.
Yes, but the colors will appear darker and more muted. White eggs give the brightest results.
Absolutely! Swirling multiple colors together can create a stunning marbled effect. Just don’t overmix, or the colors may blend into one.
Like regular hard-boiled eggs, they should be stored in the fridge and eaten within one week.
If you don’t wear gloves, yes! Food dye can stain skin, but it will fade after a few washes. Lemon juice or baking soda can help remove stains faster.
It’s not recommended – raw eggs are fragile and may break during the process. Stick to hard-boiled eggs for the best results.
🍽️ Other Recipes You May Enjoy
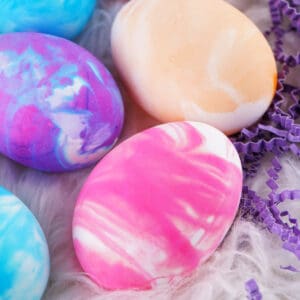
Cool Whip Dyed Easter Eggs
Equipment
- 9×13-inch baking dish
- gloves
- toothpicks
- large bowl
- paper towels
Ingredients
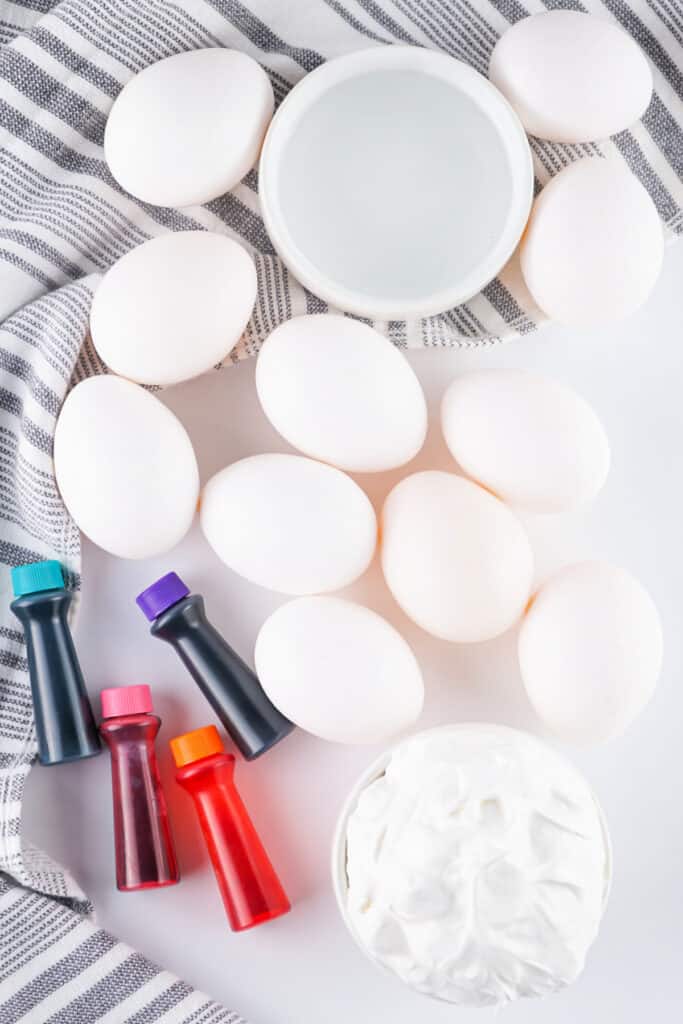
- 24 hard-boiled eggs
- 1 tub Cool Whip 16 ounces
- assorted colors of gel or liquid food dyes
- white distilled vinegar
Instructions
- Prep the Eggs – Soak boiled eggs in vinegar for 15 minutes, then rinse and dry.
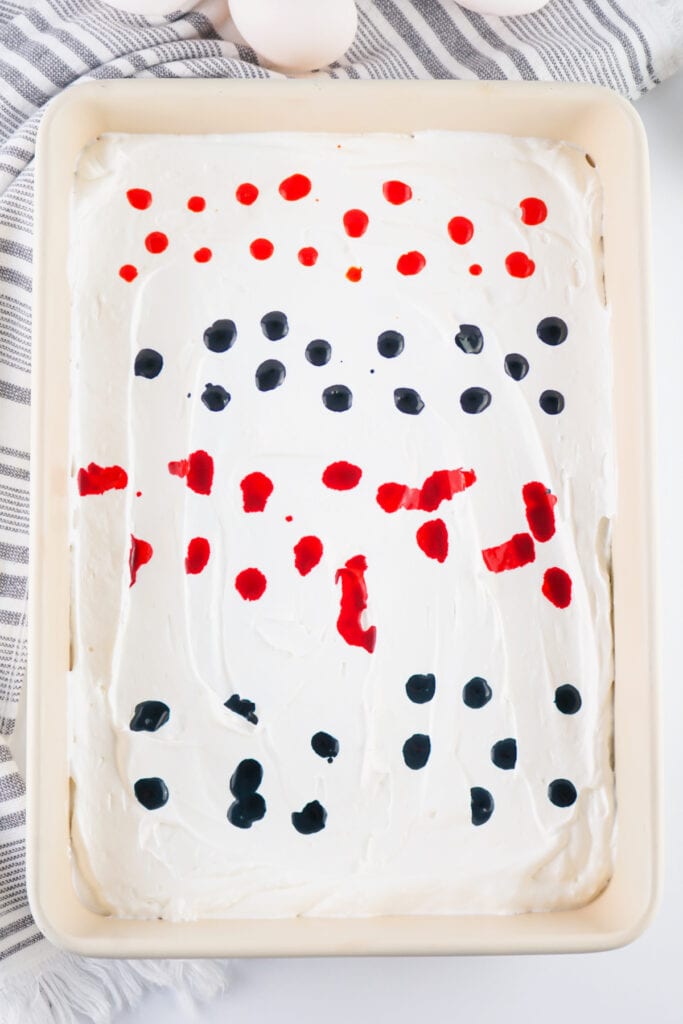
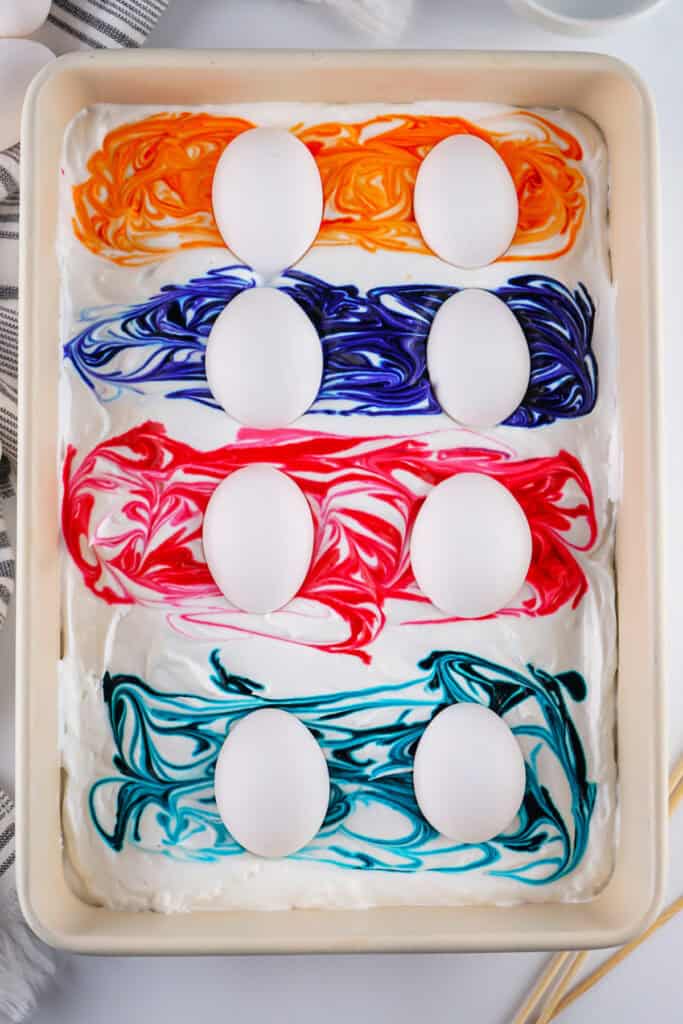
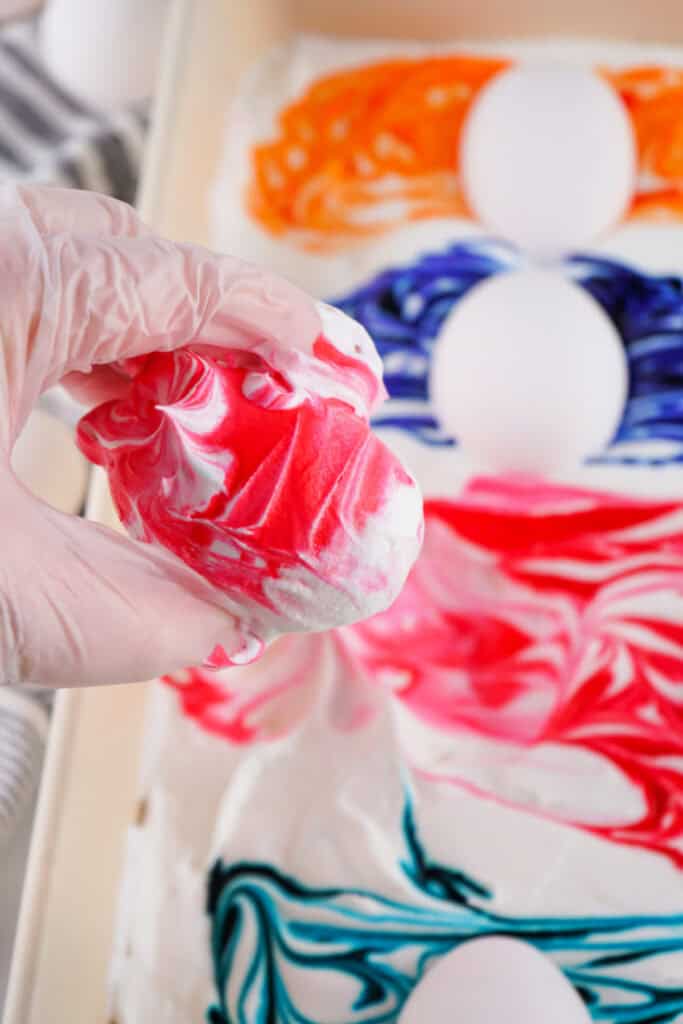
- Prepare the Dye – Spread Cool Whip evenly in a 9×13 dish. Add drops of food dye in different areas and swirl with a toothpick.
- Dye the Eggs – Wearing gloves, roll eggs in the dyed Cool Whip until fully coated. Let them sit for at least 10 minutes.
- Rinse & Dry – Gently rinse eggs (without rubbing) and place on paper towels to dry completely.
Notes
- Like regular hard-boiled eggs, these dyed eggs should be stored in the fridge and eaten within one week.
Important Tips for Cool Whip Dyed Easter Eggs
✅ Use a Deep Enough Layer of Cool Whip – The Cool Whip should be at least 1 inch deep to ensure the eggs get fully coated in the dye. ✅ Swirl Colors Lightly – Overmixing the food dye in the Cool Whip can cause the colors to blend into one muddy shade. Use a toothpick to gently swirl the dye without overdoing it. ✅ Let the Eggs Rest for Vibrant Colors – The longer the eggs sit in the Cool Whip (up to 30 minutes), the bolder the colors will be. Avoid rinsing them off too soon. ✅ Keep the Cool Whip Chilled – If working in a warm room, keep the Cool Whip in the fridge between batches so it doesn’t get too runny. ✅ Dab, Don’t Rub, When Drying – After rinsing, pat the eggs dry instead of rubbing, which can smear the colors. ✅ Experiment with Color Combinations – Try blending shades like pink and blue for purple eggs or yellow and red for orange hues. The possibilities are endless! ✅ Try Different Tools for Swirling – Toothpicks work great, but you can also use a fork or skewer for different swirl patterns. ✅ Perfect for a Group Activity – Set up multiple trays with different color combinations for a fun Easter egg station at family gatherings or parties. ✅ Make a Batch in Advance – If you’re planning for Easter morning, dye the eggs the night before and store them in the fridge once dry. ✅ Don’t Skip the Vinegar Soak – The vinegar helps the dye stick better to the eggshell, ensuring brighter and more even colors.Nutrition
Please note that the nutritional information listed on this page is an estimation based on the products I used. Ingredients and nutritional information can vary significantly between brands. Always be sure to read labels. Please verify that a recipe fits your needs before using it. Nutrition info may contain errors, so please verify it independently. Likewise, recipes may contain errors, so please use your common sense when following them.

I’m Jamie, a self-taught home cook passionate about sharing easy, delicious, and family-friendly recipes. From comforting classics to irresistible desserts, I believe homemade food brings people together. Join me on my journey of creating and sharing meals that bring joy to every table!

Leave a Reply